Does Windows 11’s display look blurry or blurry on your monitor? Here’s an easy way to fix the problem of a Blurry Screen Issue on Windows 11. Are you experiencing issue with a blurry screen on your Windows 11 PC? When you use an app, the text or images in it might not be clear or look hazy. In this guide, I have explained some troubleshooting tips that you can use and fix the blurry screen on Windows OS.
Most of the time, these glitches are caused by a wrong display resolution or a broken display driver. If the screen is blurry when you use certain apps, it could be because the GPU is experiencing at its best. It means that the graphics unit isn’t using all of its power to run that app. Because of the problem, the text or graphics are not blurry.
The Blurry Screen Issue on Windows will happen if the DPI for your main display changes after you log in to Windows or when you start any app. Then you need to change how the DPI scaling works. You don’t have to change anything by hand. You have to ensure sure that Windows changes the DPI automatically when you run that programme.
Methods to Fix Blurry Screen Issue on Windows 11
Now that we know the different things that could cause the Blurry screen Error, here are some solutions that work.
1. Enable the Best Appearance for Windows
In the Advanced system settings, you need to enable on this option. This will make sure that every app you run on Windows looks its best.
1. Hit the Windows + S keys.
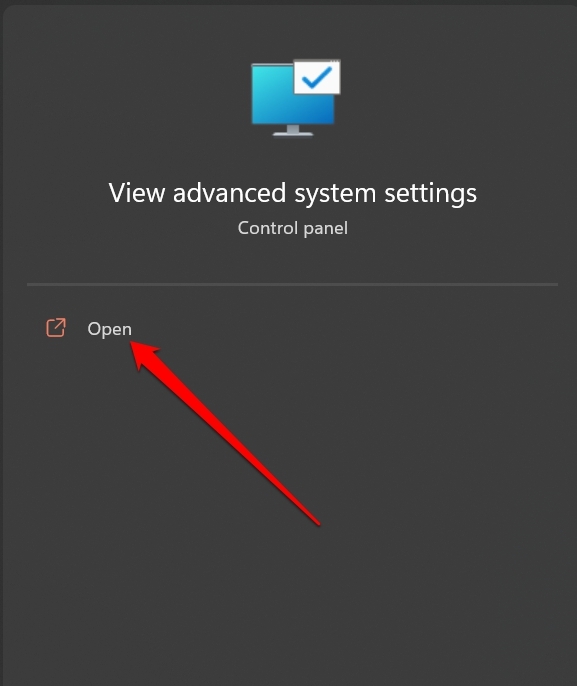
2. Type Advanced System Settings into the search box.
3. When the right result comes up, click Open.
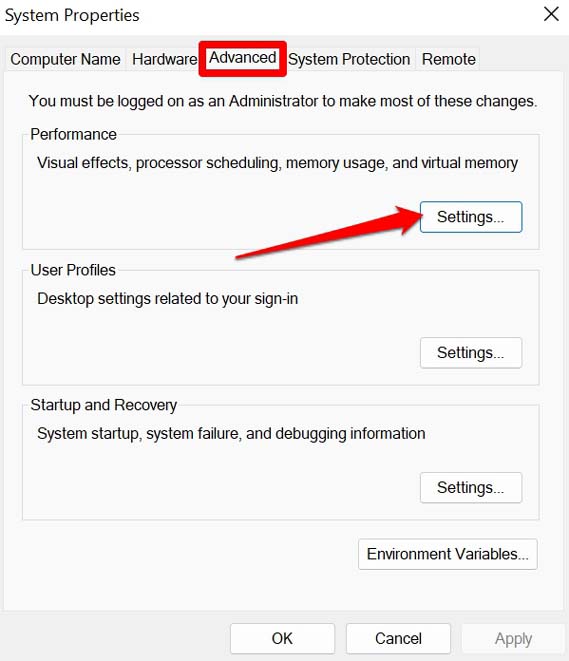
4. Now, when the System Properties box comes up, click on the tab that says “Advanced.”
5. Go to the Settings tab on the Performance tab.
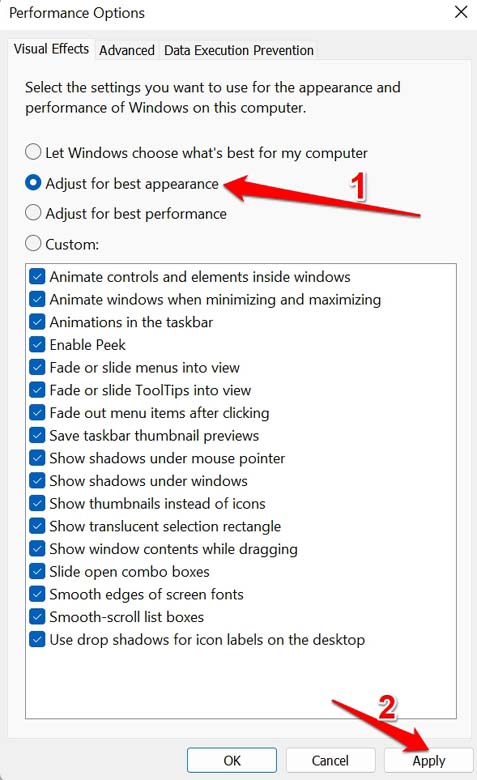
6. Select Adjust for Best Appearance under the Visual Effects tab.
7. Click “Apply” to implement the changes into effect.
2. Override High DPI Scaling Behavior
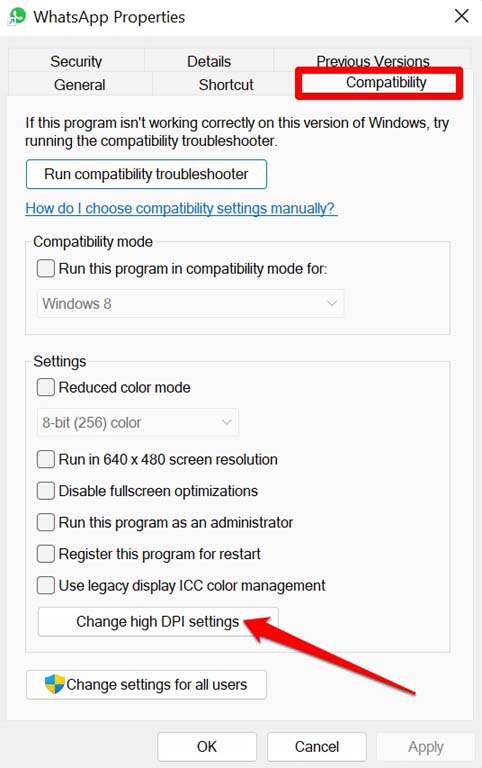
If a certain Windows app is giving you a blurry screen, you can fix it by changing the DPI settings for just that app.
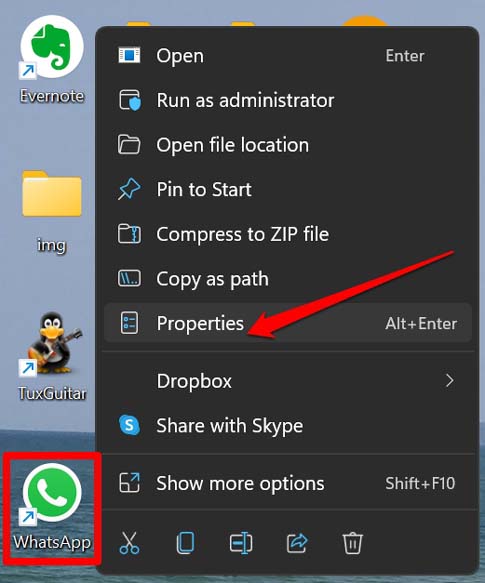
1. Find the application file that ends in “.exe” for any app.
2. Select Properties by right-clicking on the app.
3. Click Change High DPI Settings under the Compatibility tab.
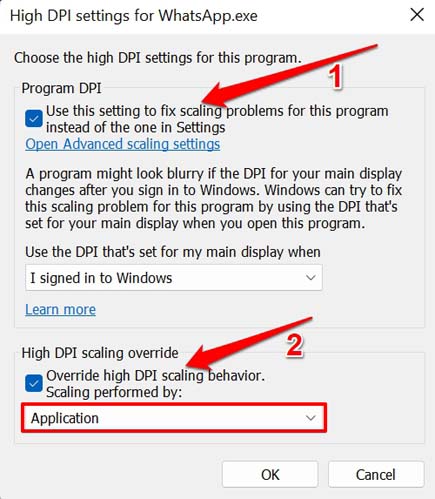
4. A new box called “High DPI settings for XYZ app” will pop up.
[xyz can be any app name for which you are changing the DPI]
5. In that box, click the checkbox Use This Setting to Fix Scaling Problems.
6. Also, click the Override High DPI Scaling Behavior checkbox.
7. Then click the select-down menu and choose “Application.”
[we are making changes to a particular app]
8. In the High DPI settings for the XYZ app dialogue box, click OK and then click Apply.
3. Update Display Driver of Windows
Make sure to update the display driver on your computer.
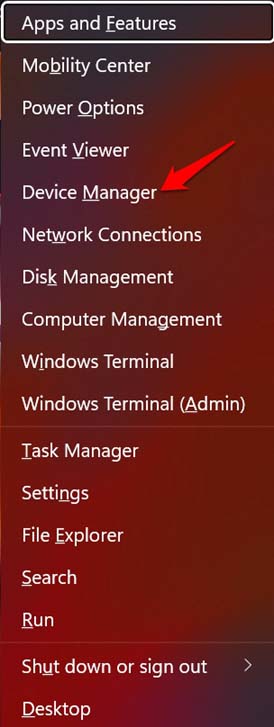
- Hit the Windows + X keys.
2. Choose Device Manager from the menu that comes up.
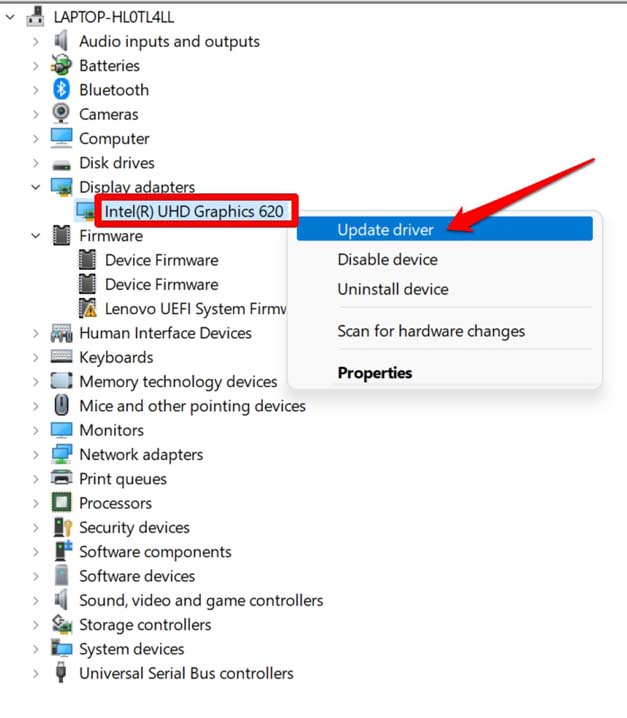
3. Then go to Display Adapters and click on it to navigate it bigger.
4. You will see the GPU that your PC has.
5. Select Update Driver when you right-click on the GPU name.
6. Then, click on Search Automatically for Drivers.
[check to see that the computer is connected to the internet]
7. Windows OS will look for drivers and install them if it finds any.
After installing the driver update, turn your PC back on and check to see if the blurry screen issue has been fixed.
4. Use the Recommended Display Resolution for Windows
If you often have problems with a blurry screen on your Windows 11 PC, make sure you are using the recommended screen resolution for your computer.
- Press Windows + I to go to the Windows Settings page.
2. Click System on the left side of the screen.
3. Then click on Display to get to the settings.
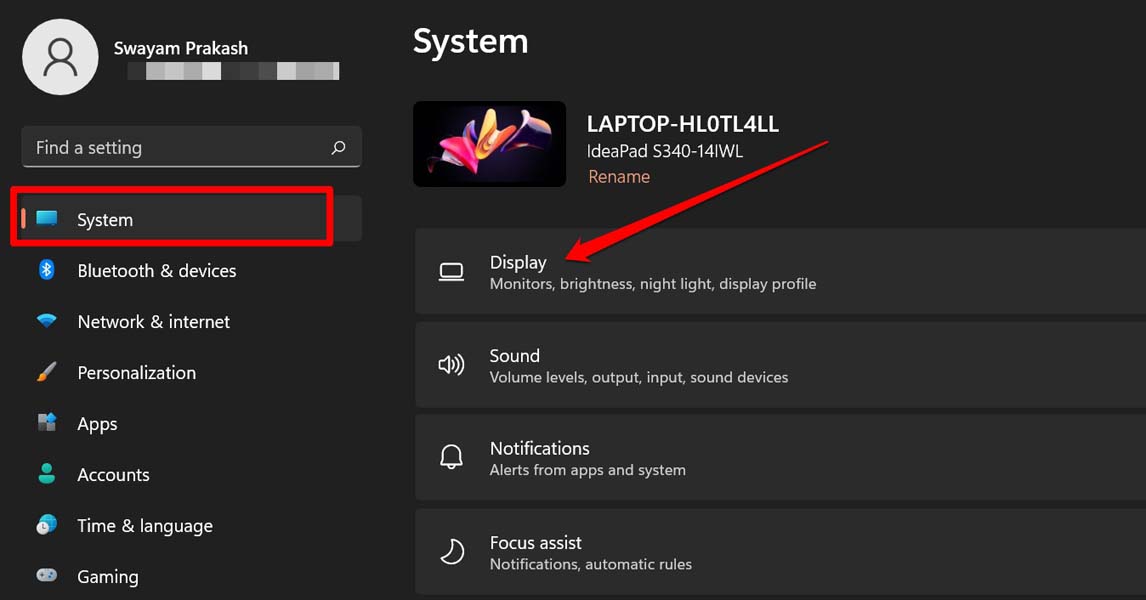
4. Go to Scale Layout and click on the drop-down menu next to Display Resolution.
5. Select the recommended option. For example, I have set my PC to the recommended resolution of 1920 x 1080.
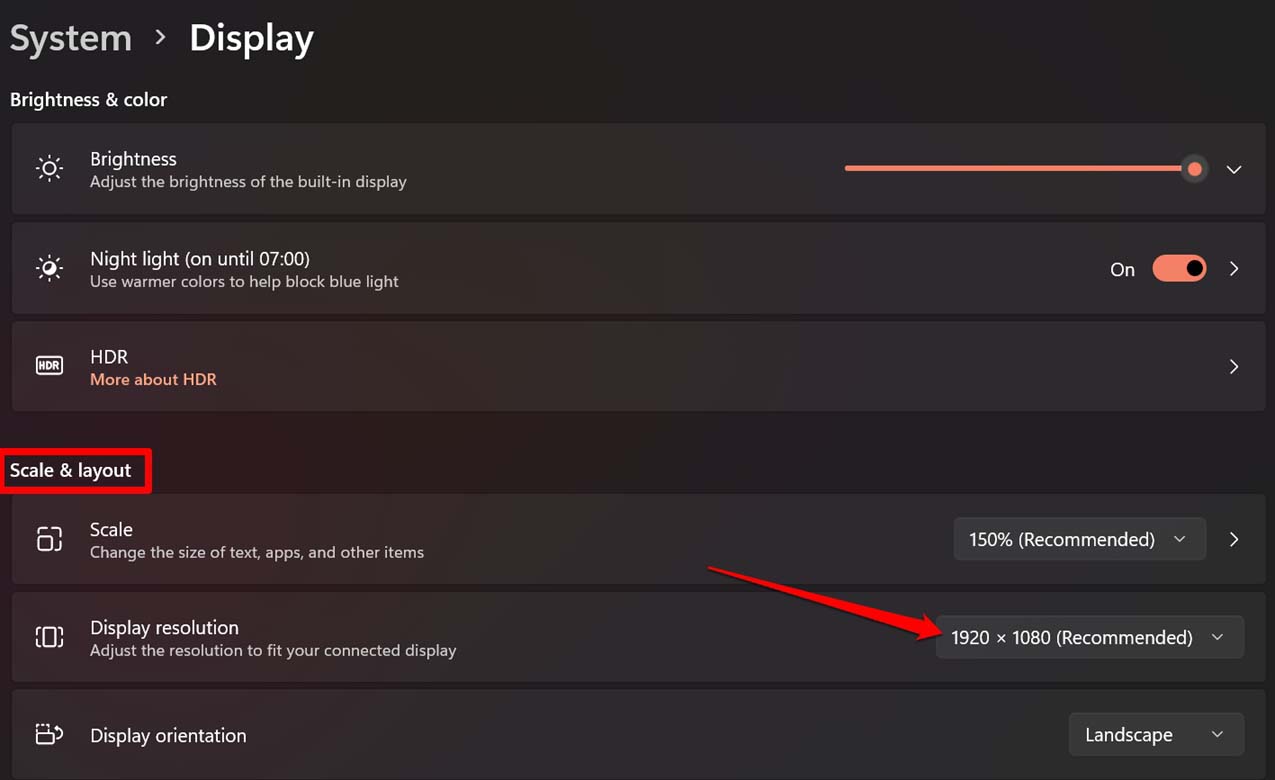
6. When it says “Keep These Display Settings,” click the “Keep Changes” button.
7. Also, click the set-down menu next to Scale to choose the recommended Scale.
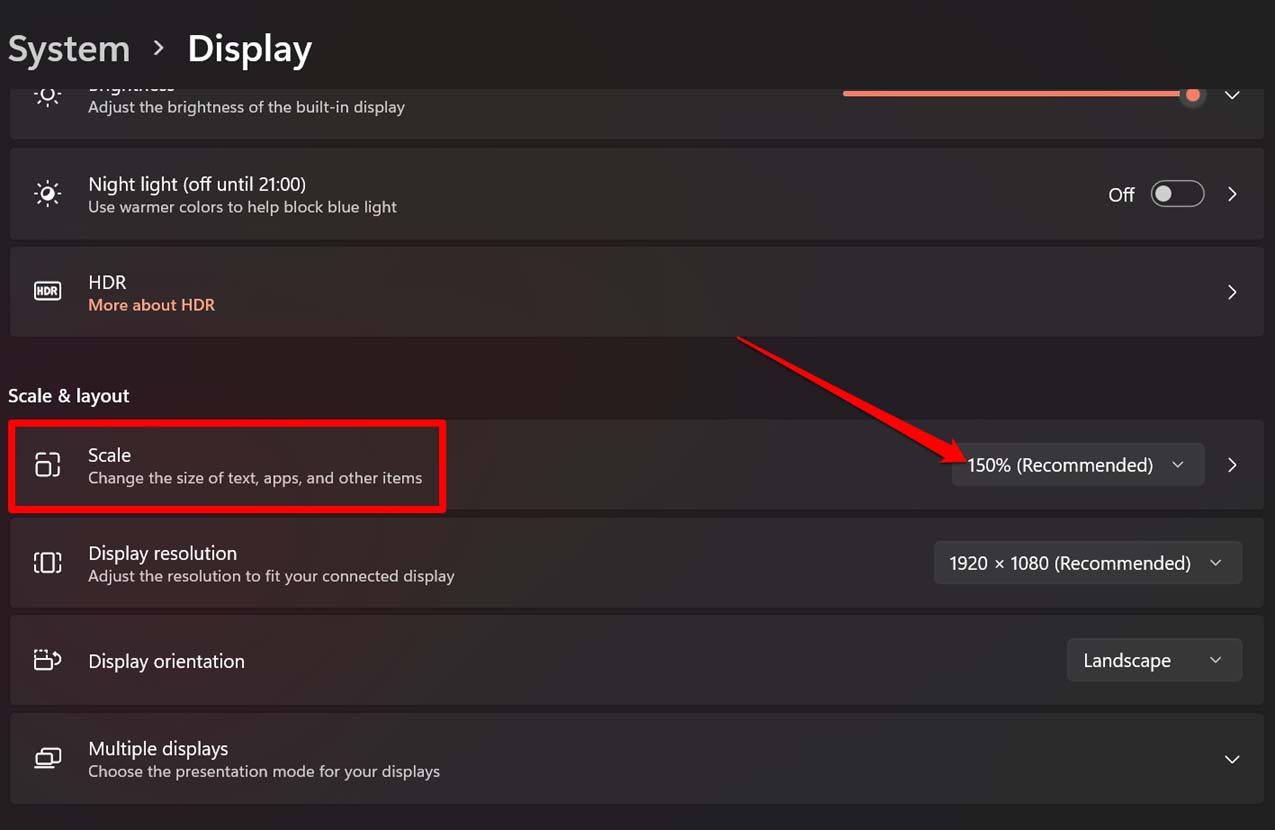
8. When you’re done making changes, restart the computer, and hopefully Windows 11’s blurry screen issue will be fixed.
5. Enable ClearType Text for Windows
You need to enable on these settings so that the text on the Windows 11 PC screen doesn’t fix blurry.
1. The Windows key is pressed.
2. Type ClearType text into the search box.
3. Click Open when the right search result comes up.
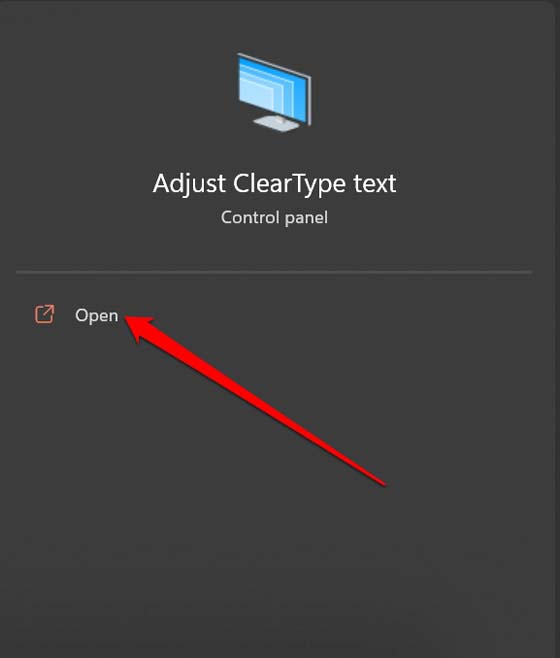
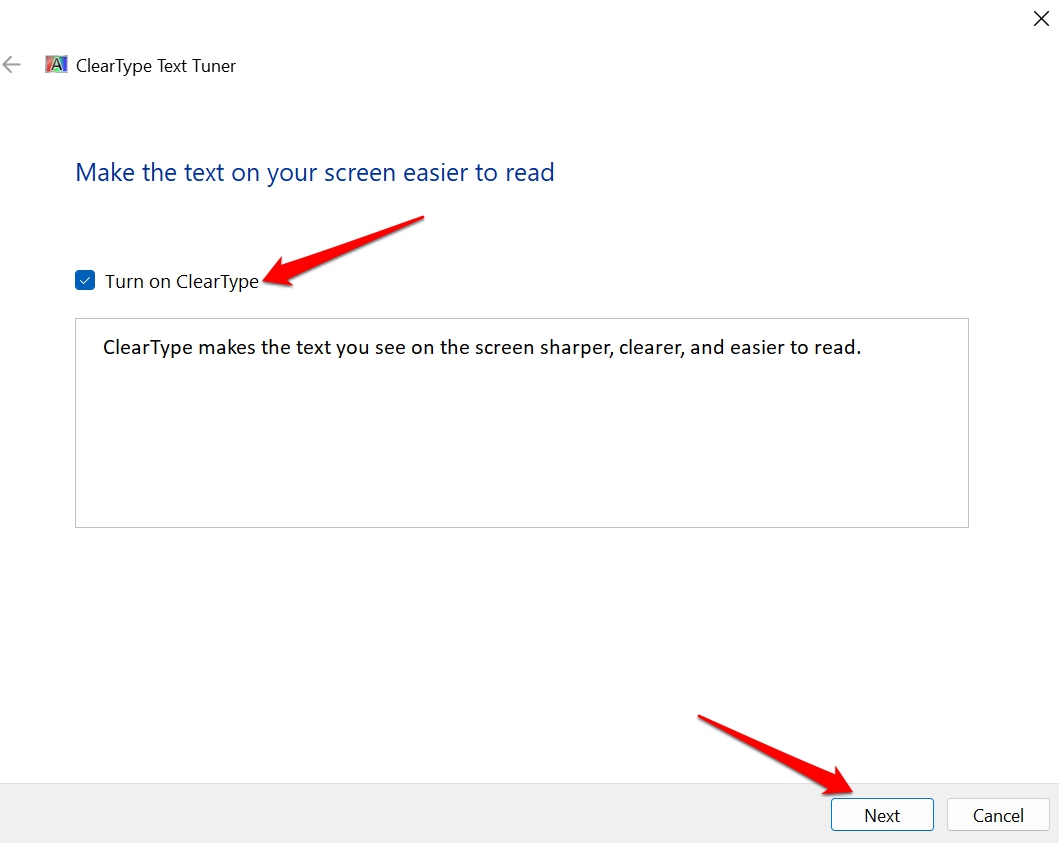
4. Click the checkbox next to Turn on ClearType to select it.
5. Then, click Next to see some examples of text.
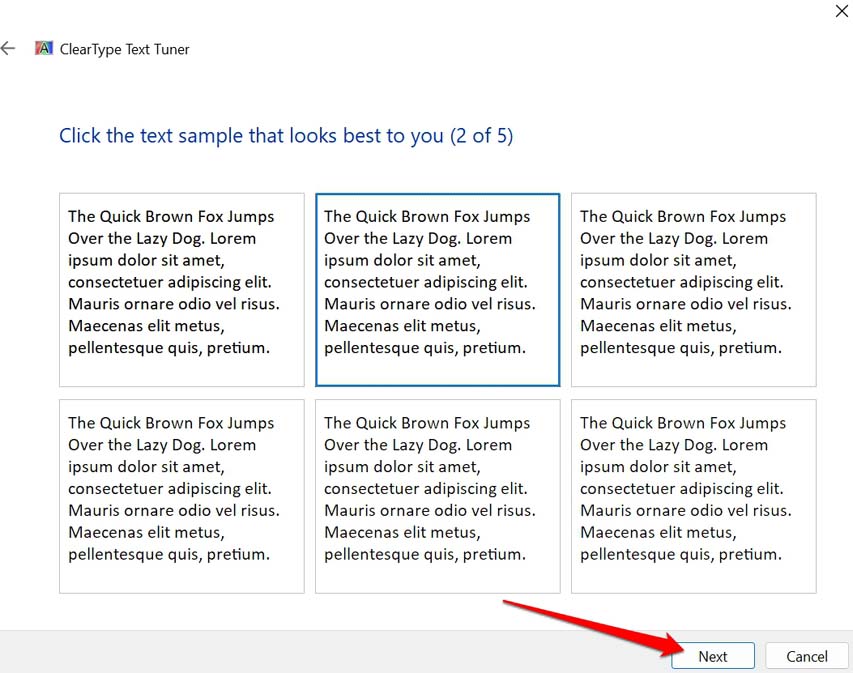
6. Choose the text you want in five places.
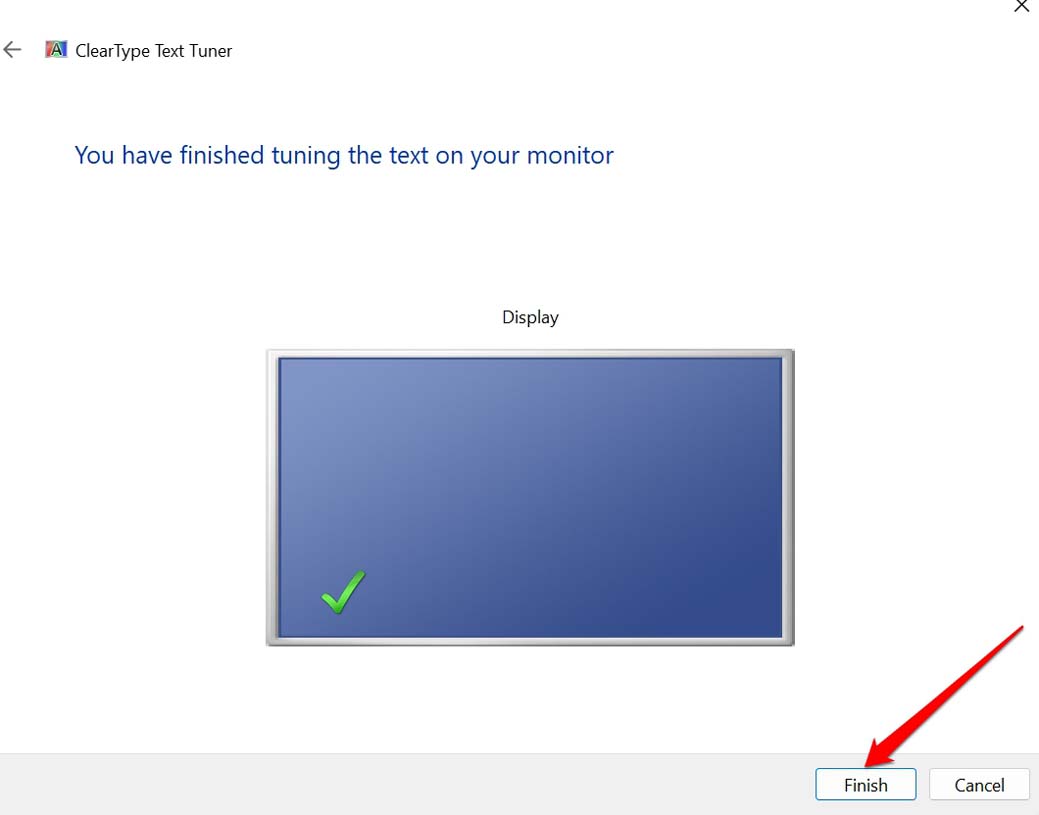
7. Click “Finish” to apply the changes into effect.
6. Enable High Performance of GPU for Any App
If you’re using an app and the screen is blurry, you need to set the GPU to give you the most speed.
- To go to the Windows Settings, press Windows + I.
2. Next, click on System and then select Display.
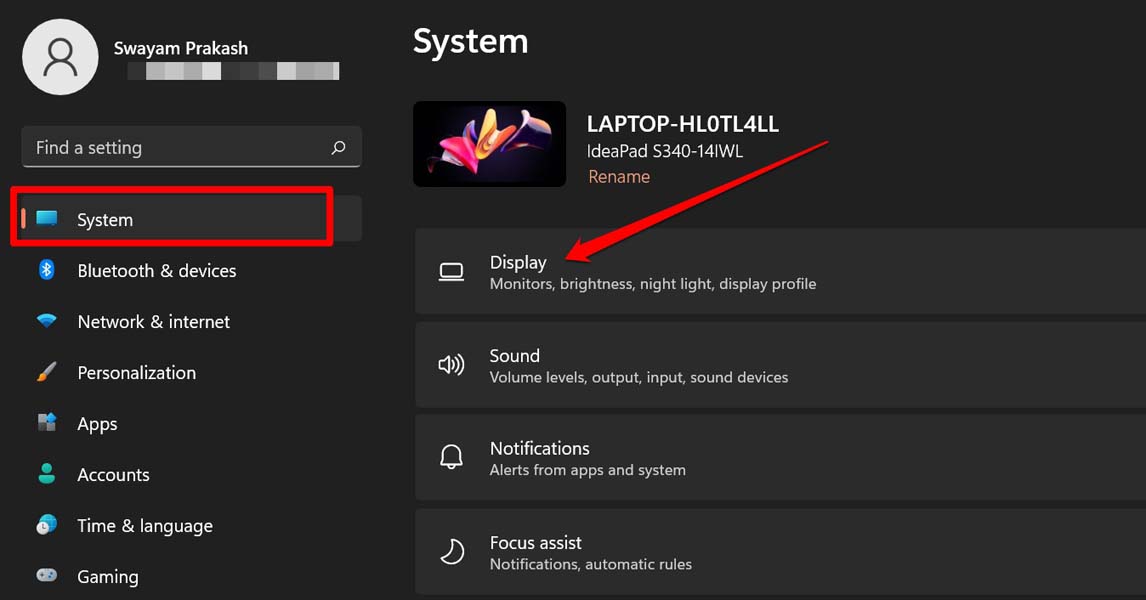
3. Click on Graphics when you get there.
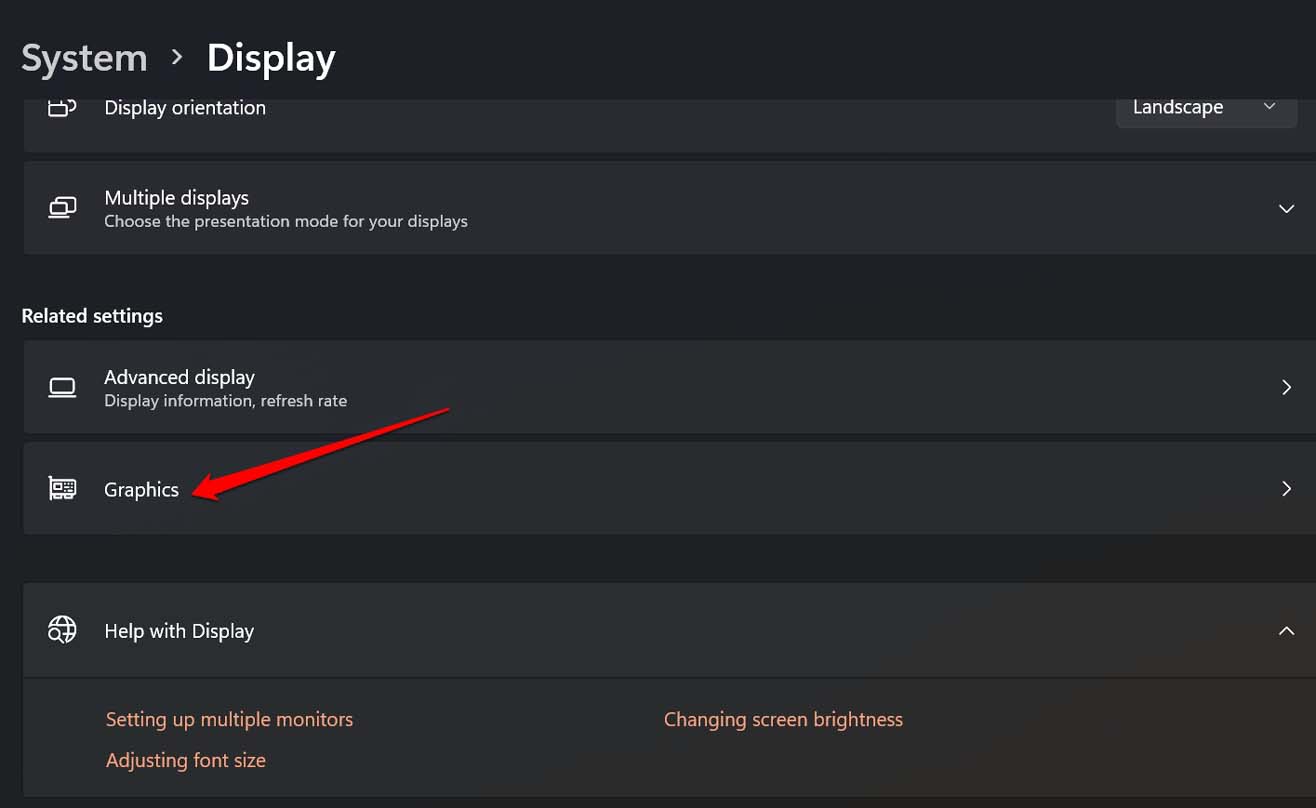
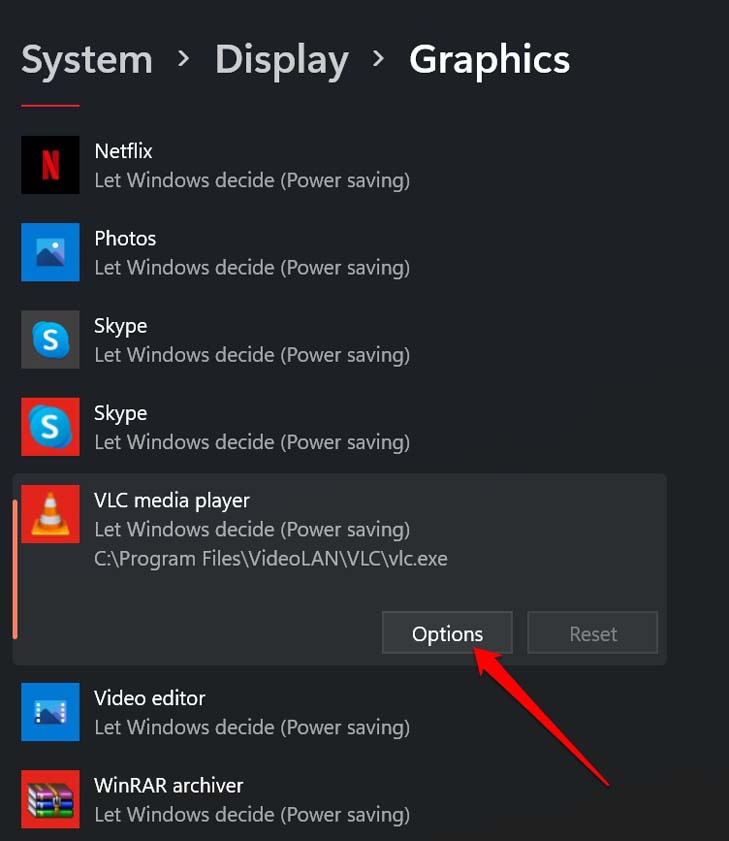
4. Next, you will see a list of all the apps on your computer.
5. Scroll down until you find any app, click it, and then click Options.
6. Set High Performance as the Graphics Preference for that app.
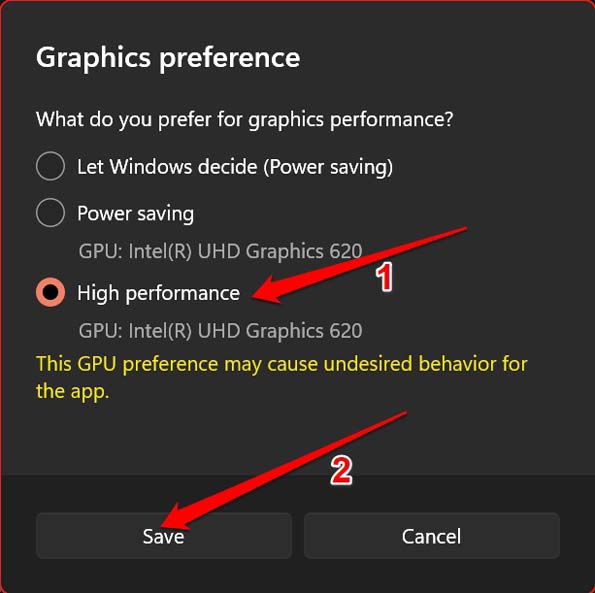
7. Click “Save” to keep the changes and open the app again. It should now fix the issue with the blurry screen.
Blurry Screen Issue on Windows Final Words:
As a user, you should always try to get the best visuals out of your Windows PC. With these troubleshooting tips, you should be able to fix the blurry screen issue on Windows 11 and see all your apps clearly. If you have anything to say about “How to Fix Blurry Screen Issue on Windows 11?,” feel free to leave a comment below.
