
Outlook’s AutoCorrect function employs hundreds of pre-programmed corrections to assist you in reducing errors as you write. It is configured by default to correct common spelling and punctuation errors. However, it may be a hindrance when it is inaccurate and produces errors. When entering proper nouns, company names, HTML, abbreviations, and other words, the AutoCorrect tool frequently interferes. Sometimes you misspell a word on purpose and want to avoid Outlook to replace it. Of course, there are times when you will use Internet lingo, such as lol, btw, omg, and so on. Continue reading to find out how to turn AutoCorrect off (and on again if desired) in Outlook and Outlook Web App (OWA) and add and remove terms from the list.
How To Easily Turn Off AutoCorrect In Outlook Web App (OWA) On Windows, Linux, Mac, Chromebook?
The approach is the same for all because Outlook OWA works in any browser on Windows, Linux, Mac, or Chromebook. If you want to use Outlook on a browser or can’t access the app on your device, easily follow these instructions to disable the AutoCorrect feature using Outlook Web Access (OWA):
Turn Off AutoCorrect In OWA Using Windows 10
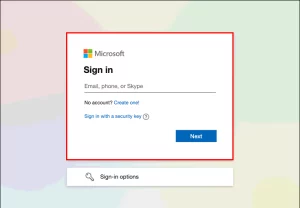
1 – Go to “Outlook.com” and sign in to your account.
2 – Select the “gear icon” (Settings) in the top-right section.
3 – On the right side of the screen, select “View all Outlook settings.”
4 – Select “Mail > Compose and reply” from the “Settings” on the left side of the screen.
5 – Scroll down to the “Text predictions” section in the right pane and uncheck “Suggest words or phrases as I type.” If it was previously disabled, you could turn it on anytime you need it.
6 – To save your changes, select the “Save” button in the bottom-right corner of the screen.
7 – To close the “Settings” menu, select the “X” in the upper-right corner.
How To Easily Turn Off AutoCorrect In Outlook App?
How To Easily Turn Off AutoCorrect In Outlook On Windows 7, 8.1, 8, 10, Or 11?
The instructions for disabling AutoCorrect in Outlook 2010 and later on Windows 7, 8, 8.1, 10, and 11 are simple.
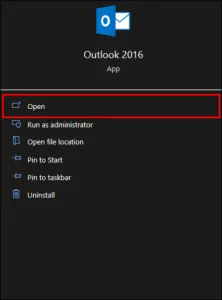
1 – Launch the “Outlook” app on Windows 7, 8, 8.1, 10, or 11.
2 – In the top-left section, select “File.”
3 – In the bottom-left section, choose “Options.” If the menu window extends to the bottom of the screen, you may need to maximize it or move it up to view “Options.”
4 – On the left, choose “Mail,” then on the far right, click the “Editor Options” button.
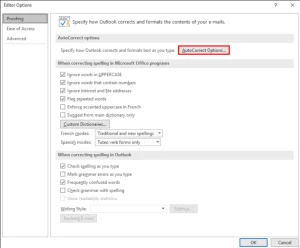
5 – Select “Proofing” and then “AutoCorrect Options…”
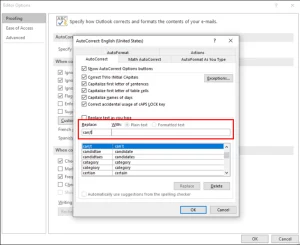
6 – Disable the “Replace text as you type” option under the “AutoCorrect” menu.
7 – To save your changes, select the “OK” button.
How To Easily Turn Off AutoCorrect In Outlook App On A Mac?
Here’s how to deactivate AutoCorrect on your Mac using the Outlook app:
1 – Launch Outlook and sign in to your account.
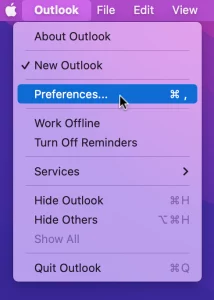
2 – At the top left section of the Menu, choose “Outlook > Preferences.”
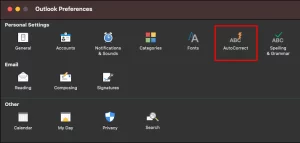
3 – Select “AutoCorrect” from the “Personal Settings” menu.
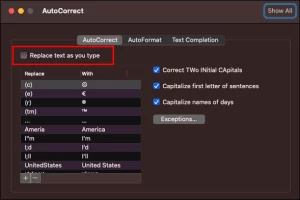
4 – To disable AutoCorrect, select the “Replace text as you type” option.
How To Easily Add Or Remove Words From AutoCorrect In Outlook App?
You can delete and add terms to the AutoCorrect list using the desktop version. Here’s how to make changes to the list on Windows or Mac:
Note: This option isn’t supported in OWA.
Remove And/Or Add Words In Outlook AutoCorrect Using Windows
1 – Launch “Outlook,” regardless of whether you’re using Windows 7, 8, 8.1, 10, or 11.
2 – In the top-left section, select “File.”
3 – In the bottom-left section, choose “Options.” If the menu window extends to the bottom of the screen, you may need to maximize it or move it up to view “Options.”
4 – In the “Mail” menu, select “Editor Options.”
5 – On the left, choose “Proofing,” then on the right, click “AutoCorrect Options…”
6 – Ensure that you’re on the “AutoCorrect” tab. Type the misspelling you want to remove or add to your list in the “Replace” box.
7 – If the misspelling exists, the right spelling will be underlined in the AutoCorrect list. Otherwise, the misspelling displays just in the “Replace” box where you entered it.
8 – To add a misspelled word to the list, click the proper spelling in the “With:” box and type the “Add” button.
9 – To remove an entry, type the misspelled word into the “Replace” box, then highlight it (if necessary) and click the “Delete” button.
10 – When you’re through AutoCorrect, click the “OK” button to close the settings.
Add And/Or Remove A Word In Outlook AutoCorrect List Via Mac
1 – Access your “Outlook” account.
2 – At the top left section of the Menu, select “Outlook > Preferences.”
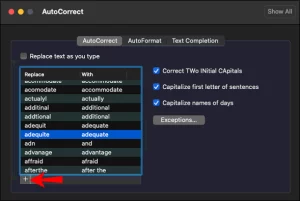
3 – Select “AutoCorrect.”
4 – To remove a word, select the “AutoCorrect” option, click on the list and type the first few characters of the word or phrase you want to delete.
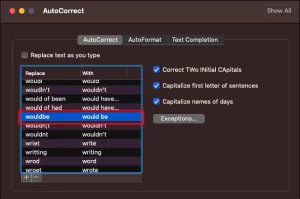
5 – Click the list entry, then the “minus” (-) sign.

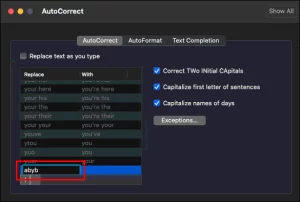
6 – To add a word to the AutoCorrect list, choose the “AutoCorrect” tab, then click the “plus” (+) sign in the bottom left of the dialogue box.
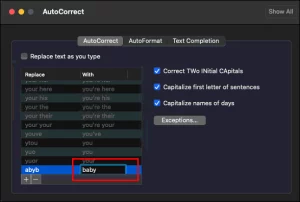
7 – Enter the misspelled word or phrase in the “Replace” section.
8 – Type the proper spelling in the “With” column and hit “Enter.”
How To Easily Remove A Misspelled Word From Spell Check In Outlook?
The “Custom Dictionaries” section manages all custom dictionaries. As a result, you must select any custom dictionaries you want to use in the “Custom Dictionaries” dialogue box. To add or remove terms from custom dictionaries, follow these steps:
Note: When you add a word to the custom dictionary using an Office app, it becomes available for spell checks across all Office apps.
Windows 10
1 – Sign in to the Outlook account.
2 – Choose “File,” “Options,” and then “Mail.”
3 – Select “Spelling and AutoCorrect,” then “Proofing.”
4 – Ensure the “Suggest from main dictionary only” option is unchecked.
5 – Select “Custom Dictionaries” and then check the dictionary you wish to edit.
6 – Select “Edit Word List” and do one of the following actions:
- Select a word in the “Word(s)” area, then click “Add.”
- To remove a word, select it in the “Dictionary” box and then click “Delete.”
- Edit a word by removing it and then replacing it.
- Remove “Delete all” to delete all words.
Mac
The steps for editing the custom dictionary in Outlook for Mac differ somewhat from those for Windows:
1 – Sign in to Outlook, then choose “Preferences.”
2 – Select “Spelling and Grammar” from the “Authoring and Proofing Tools” menu.
3 – To use custom dictionaries, uncheck the “Suggest from main dictionary only” box.
4 – Select “Dictionaries,” then the dictionary you want to edit.
5 – Take care not to uncheck the dictionary option by accident.
6 – Click “Edit.” The custom dictionary will open as a document that may be edited.
7 – Make your changes, then click “Save.”
Most of the time, AutoCorrect is a fantastic helper while writing emails. However, the function only sometimes makes the needed corrections and can result in errors. As a result, your message may appear unprofessional if you do not catch AutoCorrect’s mistake. Fortunately, this function can be activated and disabled anytime in Outlook. You may also remove and add terms to its pre-configured autocorrection list. However, is there ever a time when AutoCorrect became a hindrance rather than a help? If so, please share your experience in the comments section below.